Mounting Old Fashioned Hand Water Pump
How to Install a Mitt Water Pump Fountain
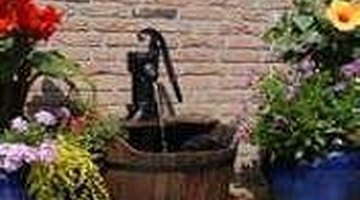
A throwback to the olden days are the sometime mitt-pump style water spout. You lot used to have to pump the handle to build up pressure for the water to pump from the water well to the spout to fill buckets for h2o for the home.
Hand pump fountain
- Concrete pad
- 2 half barrels
- Drill
- Round saw
- Mail service hole digger
- 5 4-by-four-inch posts
- Quikrete
- Level
- Record measure
- 3/four-inch plywood
- Nails
- Hammer
- Pond liner
- Staple gun and staples
- Scissors
- Silicone caulk
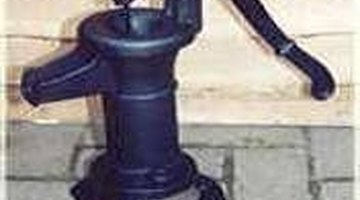
- Old hand pump water spout
- Submersible pump with tubing
Although modern conveniences are better, the rustic look of the sometime water pumps are a beautiful addition to any garden. Take a trip to a junkyard or flea markets to find different sizes of the old manus pumps to convert them into water fountains.
-
Choose a location for your water fountain. Keep in mind that it volition need to be close to an electric outlet. Also, make up one's mind on how large the fountain will be to determine how big a h2o pump, barrels and concrete pad will be. Leave plenty room between the pad and whatever structure to concur the pedestal for the fountain, which will be built with five four-by-iv-inch boards. The pedestal will be 12 inches square.
-
Place the concrete slab in the area the fountain will be. Make sure information technology is level.
-
Place one barrel close to the dorsum edge of the concrete slab. Position the second barrel over the back side of the top rim of the first butt. It volition hang over in the back approximately eight inches.
-
Drill a 1-inch pigsty near the pinnacle rim and in the dorsum of the start barrel for the tubing. Cut a 1-inch V in the forepart of the top rim of the 2nd barrel. This is where the h2o volition spill into the bottom barrel.
-
Dig 5 holes, each iv inches deep, with the mail service hole digger, between the pad and the dwelling. Make a square with four posts in the corners and one in the middle. Drop the 4-by-four-inch posts into each pigsty and make full with Quikrete, according to manufacturer directions. Make certain the posts are equally tall equally the second barrel and cheque that they are level. Allow the Quikrete to dry, co-ordinate to manufacturer directions.
-
Cut a 12-inch square of 3/4-inch plywood and place on top of the posts. Blast in place by nailing through the plywood ii to 3 times into each post.
-
Line each barrel with the pond liner, staple information technology close to the pinnacle rim and trim off any excess. Poke a hole in the liner where the pigsty is located in the bottom butt. Identify silicone caulk around the pigsty to seal it from leakage.
-
Place the paw pump on the pedestal. Place the 2nd butt on top of the kickoff, with the overhang or bulk of the second pump resting on the pedestal, in front of the pump. Adjust as necessary for stability. Brand certain the Five is in the front end of the second barrel for the water to spill downwards into the offset barrel.
-
Place the pump into the bottom barrel and thread the tubing through the hole and upwards through the bottom of the plywood. Drill the hole in the plywood at this signal to ensure the hole is in the correct spot.
-
Go on to thread the tubing up from the bottom of the hand pump and through the middle into the opening of the spout. Caulk the tubing to either the pinnacle or the bottom of the spout and trim off excess so it can't be seen. Allow everything to dry thoroughly. When dry, make full the bottom barrel with h2o turn the pump on and watch the water broadcast. Information technology may exist necessary to add together water equally the pump circulates the h2o from the bottom barrel to the pinnacle barrel.
Warning
Use all safety precautions when using power equipment.
0 Response to "Mounting Old Fashioned Hand Water Pump"
Post a Comment